
Imagine sinking into your very own rope hammock, feeling the gentle sway as stress melts away. Wouldn’t it be amazing to create that relaxing escape with your own hands?
Making a rope hammock is easier than you think, and it gives you a unique, cozy spot to unwind. In this guide, you’ll discover simple steps and tips to craft a sturdy, comfortable hammock tailored just for you. Ready to turn a few ropes into your new favorite hangout?
Let’s get started!
Table of Contents
Choosing The Right Materials
Choosing the right materials is key to making a strong and comfortable rope hammock. The right supplies ensure safety and durability. They also affect the hammock’s look and feel. Picking good materials saves time and effort in the long run.
Natural fibers like cotton are soft and comfy. They breathe well but can wear out faster outside. Synthetic ropes like nylon or polyester resist weather. They last longer and dry quickly. Choose rope with a thick diameter for more strength. Around 3/8 inch is a good size.
Check the rope’s weight limit before buying. It should hold at least 400 pounds for safety. Some ropes resist sun, rain, and mildew better. These materials keep the hammock strong for many years. Avoid thin or weak ropes that may snap easily.
Plan your hammock size first. You need enough rope to weave comfortably. Measure twice, buy extra rope to avoid running out. Usually, 100 to 150 feet of rope works for one hammock. Extra rope allows for knots and adjustments.
Get sturdy wooden spreader bars for even support. Metal rings or hooks help with hanging. Sandpaper smooths rough wood edges. Consider weatherproof paint or sealant to protect wood. These items improve safety and comfort.

Credit: www.youtube.com
Tools You Will Need
Making a rope hammock needs some basic tools. These tools help you work safely and easily. Having the right tools saves time and effort. You can make a strong, comfortable hammock with them.
Measuring Tape
A measuring tape helps you get the right rope length. Accurate measurement is important for a balanced hammock. It also helps in cutting the rope properly.
Rope Cutter Or Sharp Scissors
You need a sharp tool to cut the rope cleanly. Frayed ends can weaken the hammock. Use a cutter or strong scissors for neat cuts.
Scissors
Scissors are useful for trimming smaller rope ends and threads. They help keep the hammock tidy and safe to use.
Gloves
Gloves protect your hands from rope burns. They give you a better grip while knotting the ropes. Gloves make the work more comfortable.
Wooden Dowel Or Spreader Bar
This keeps the hammock open and flat. It prevents the ropes from bunching together. A wooden dowel or spreader bar is easy to find.
Strong Rope
Choose a durable rope made of cotton or polyester. The rope holds your weight and lasts longer. Make sure it is thick and strong enough.
Measuring And Cutting The Rope
Measuring and cutting the rope is the first key step in making a rope hammock. Accurate measurements ensure your hammock is strong and comfortable. Cutting the rope to the right length saves time and prevents waste.
Use a tape measure and mark the rope clearly. Measure twice to avoid mistakes. The length depends on the hammock size you want. Add extra rope for knots and loops. This extra length helps hold the hammock securely.
Choosing The Right Rope Length
Decide the size of your hammock first. A standard hammock is about 10 to 14 feet long. Add at least 3 feet more for tying knots. This extra rope will keep your hammock safe and stable.
Marking The Rope For Cutting
Use a marker or tape to mark the rope. Mark each piece carefully. Clear marks help you cut straight. Cutting straight ropes makes knot tying easier and neater.
Cutting The Rope Safely
Use sharp scissors or a rope cutter. Cut slowly to avoid fraying. Wrap tape around the cut point before cutting. This holds the rope fibers together during the cut.

Credit: www.youtube.com
Creating The Hammock Body
Creating the hammock body is the main step in making a rope hammock. This part holds your weight and provides comfort. The body needs strong, even knots and tight weaving. Taking time here ensures your hammock is safe and long-lasting.
Choosing The Right Rope
Start with a strong, flexible rope. Cotton or polyester works well. The rope should be thick enough to hold weight but easy to tie. Measure enough rope to make the full hammock length plus extra for knots.
Setting Up The Frame
Use a sturdy frame or two fixed points to stretch the rope. Keep the rope taut but not too tight. This setup helps keep even tension while weaving the hammock body. It makes knotting easier and the final product stronger.
Tying The Base Knots
Begin by tying a row of simple knots across the frame. These knots form the hammock’s base. Keep each knot the same size and space. Consistent knots help spread weight evenly when you lie down.
Weaving The Rope Pattern
Weave the rope back and forth between the base knots. Use over-and-under patterns to create a sturdy mesh. Pull each rope tight to avoid loose spots. This pattern holds the shape and supports your body comfortably.
Finishing The Edges
Secure the edges with tight knots or a braided border. This stops the rope from unraveling over time. Strong edges improve the hammock’s durability. Check every knot to confirm it is firm and secure.
Weaving Techniques For Strength
Weaving a rope hammock needs strong and steady techniques. These methods make the hammock safe and durable. The right weave holds the weight without stretching or breaking.
Different weaving styles give different strengths. Choosing the proper method helps the hammock last longer. Here are some common weaving techniques that add strength.
Basic Knotting For Stability
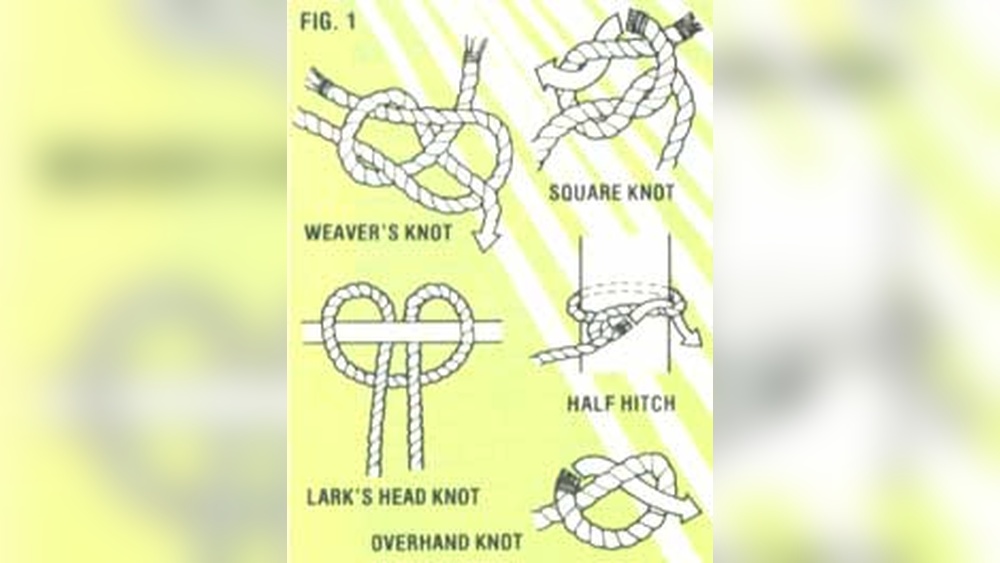
Start with tight knots. Use knots that do not slip under pressure. The square knot and the double half hitch knot work well. These knots keep the ropes from loosening during use.
Diamond Weave Pattern
This pattern creates a net-like structure. It spreads weight evenly across the hammock. The diamond weave uses interlaced ropes in a crisscross pattern. This design improves both comfort and strength.
Looping For Extra Support
Loops add extra hold to the edges. Tie loops at regular intervals along the rope. These loops connect to the hammock frame or tree easily. This technique reduces stress on single points.
Double Weaving Method
Double weaving means using two layers of rope. The second layer strengthens the first. This method prevents holes and weak spots. It is good for hammocks meant to hold more weight.
Adding The Spread Bars
Adding the spread bars is an important step in making a rope hammock. These bars keep the hammock open and flat. They stop the rope from bunching up and make it easy to lie down. Spread bars give the hammock a neat look and better comfort.
Choosing The Right Wood For Spread Bars
Select strong, smooth wood for the spread bars. Hardwood like oak or maple works well. Avoid soft wood that can break easily. The wood should be long enough to hold the hammock open. Sand the wood to remove rough spots or splinters.
Drilling Holes For The Rope
Measure equal spaces along the wood for holes. Use a drill to make holes big enough for the rope. The holes must be straight to keep the hammock balanced. Smooth the edges of the holes to protect the rope from damage. This step helps the rope pass through easily.
Attaching The Rope To The Spread Bars
Thread the rope through the holes carefully. Tie strong knots to hold the rope in place. Make sure the knots are tight and secure. Check each knot to avoid slipping or loosening. This keeps the hammock stable and safe to use.
Finishing The Ends
Finishing the ends of your rope hammock is key for safety and style. It stops the ropes from fraying and keeps the hammock strong. This step gives your hammock a neat, clean look.
Pay close attention to the knots and wraps you use. They hold everything tight and secure for a safe hammock.
Preparing The Rope Ends
Cut the ropes evenly to the desired length. Use sharp scissors or a knife for a clean cut. Lightly burn the ends with a lighter to stop fraying. Do this carefully to avoid weakening the rope.
Tying Secure Knots
Use strong knots like the double overhand or figure-eight knot. These knots hold the ropes well and last long. Tighten each knot firmly to prevent slipping. Check the knots before hanging the hammock.
Wrapping The Ends
Wrap the rope ends with twine or thin rope. This adds extra security and looks tidy. Wrap tightly and cover about two inches of the rope. Tie the wrapping rope securely at both ends.
Adding Metal Or Wooden Rings
Attach metal or wooden rings to the rope ends. Rings help connect the hammock to hooks or trees. Slide the rope through the ring before tying the final knot. Make sure the rings are strong and rust-resistant.

Credit: www.instructables.com
Hanging Your Hammock Safely
Hanging your rope hammock safely is key to enjoying it without worry. Proper hanging prevents accidents and extends the hammock’s life. Follow simple steps to secure your hammock correctly.
Choose Strong Support Points
Pick two sturdy trees or posts. They should be about 10 to 15 feet apart. Check that each support can hold your weight plus the hammock’s weight. Avoid weak or damaged trees.
Use Quality Hanging Hardware
Use strong ropes, straps, or chains made for hammocks. Avoid thin or frayed materials. Secure hooks and carabiners to prevent slipping. Proper hardware keeps your hammock stable and safe.
Hang At The Right Height
Attach your hammock so it hangs about 18 inches off the ground. This height is easy to get in and out of. It also reduces injury risk if you fall. Adjust the ropes to get a gentle curve in the hammock.
Test Before Relaxing
Sit down slowly to check stability. Listen for creaks or feel for movement. If anything feels loose, tighten your knots or change the support points. Never hang your hammock above hard surfaces like concrete.
Maintenance Tips For Longevity
Proper care keeps your rope hammock safe and lasting. Follow simple steps to protect it from wear and tear. These tips help maintain strength and look. Enjoy your hammock longer with regular attention.
Store Your Hammock Properly
Keep the hammock dry before storing. Avoid folding it tightly to prevent creases. Use a breathable bag or container. Store in a cool, dry place away from sunlight.
Clean Gently And Regularly
Use mild soap and water for cleaning. Avoid harsh chemicals that weaken the rope. Rinse thoroughly to remove soap residue. Let it air dry completely before use or storage.
Check For Wear And Damage
Inspect ropes for frays or weak spots often. Replace damaged parts immediately to avoid accidents. Tighten loose knots to keep the hammock secure. Regular checks ensure safe relaxation.
Protect From Weather Elements
Keep the hammock out of rain and snow. Sun exposure breaks down rope fibers over time. Use a cover or bring indoors during bad weather. Proper protection extends its life greatly.
FAQ: How to Make a Rope Hammock
What Materials Are Needed To Make A Rope Hammock?
You need strong rope, wooden spreader bars, and metal rings for support. A sturdy tree or stand is also important for hanging.
How Long Does It Take To Make A Rope Hammock?
Making a rope hammock usually takes 3 to 5 hours. Time depends on skill and the hammock’s size.
Can Beginners Make A Rope Hammock At Home?
Yes, beginners can make a rope hammock with patience and simple tools. Clear instructions help avoid mistakes.
What Type Of Rope Is Best For Hammocks?
Use cotton or polyester rope for comfort and durability. These ropes resist weather and hold weight well.
How Do You Hang A Rope Hammock Safely?
Securely tie the hammock to strong trees or stands at about 4-5 feet high. Check knots and weight limits before use.
Conclusion
Making a rope hammock can be a fun and rewarding project. You only need a few materials and some patience. Follow the steps carefully, and you will create a comfortable place to relax. This project also lets you enjoy time outdoors in a new way.
Take your time, and don’t rush. Soon, you will have a sturdy hammock ready to use. Enjoy the comfort and peace it brings to your space. Try making one yourself and feel proud of your work.